Want to start your own money-making blog but don’t know how to go about it? Worry not! Here is an easy, step-by-step guide to help beginners learn how to start a blog and make money from it.
Starting a blog is one of the best ways to launch your own online business and make money from anywhere in the world.
Despite what many people believe, you don’t need to be a great writer or a web designer/developer to be a successful blogger. Blogging is accessible to anyone regardless of age, location, or experience level.
Free Resource Library for Bloggers
How To Start A Blog And Make Money From It

What you’ll need:
- Basic computer skills
- A domain name
- A good web hosting service that works well with WordPress like Fast Comet or Siteground
- WordPress installation
- WordPress theme and plugins
- About 45 minutes to 1 hour of your time
Step #1. Pick a Niche
The first thing is to choose a niche for your blog. This is an important step because you have to choose the right niche for your blog to be successful.
Don’t know what a niche is? Well, this is simply a specific segment of people that you’ll be targeting within a certain market/industry.
For instance, within the travel industry, you could target niches such as “camping“, “road trips”, or “traveling on a budget.” If you were to venture into the finance industry, you could focus on niches such as “frugal living“, “side hustle ideas“, “investing“, or “early retirement.”
The important thing to note here is: instead of writing about everything, you want to focus your blog content around a specific thing. Target a specific group of people.
One way to go about is to pick a niche that you are most interested in. What things are you passionate about?
And because you want to make money with your blog, you must also consider market factors when choosing a niche. Make sure the niche you choose has enough audience interest (a topic people search for), and that the audience is willing to spend money.
Since we are talking about starting a profitable blog and not blogs that are just a hobby, you need to look at blog niches that can actually bring money.
Based on human nature, people will always look for information on topics such as:
- Health
- Personal Finance
- Making money
Step #2. Decide on a Domain Name for Your Blog
Now that you’ve settled on a niche, let’s proceed and pick a name for your blog.
Your blog’s domain name is what readers see first and will also be its unique address on the internet (something like workathomesmart.com). It is the web address people will type in their browsers to get to your blog.
Your domain name should reflect the topics you’ll be writing about.
Things to consider when picking a name for your blog:
- make it as short as possible
- should be descriptive so that potential visitors can easily tell what your blog is about
- should be unique and grab readers’ attention
- if it’s a personal blog, you can as well use your own name or some variation of it
Step #3. Select a Blogging Platform
After selecting a niche and name for your blog, you are ready to start building your site.
But first, you must choose the right blogging platform that will make it seamless for you to start your blog and make money with it.
Although there are many free blogging platforms on the internet, I recommend having your own self-hosted blog.
Free blogging platforms have their limitations. If you’re serious about making money with your blog, treat it like a business from the start.
It’s hard to make money with free blogging platforms because companies and potential advertisers/partners will not take you seriously.
Besides, when you use free blogging platforms, your blog name will be set as a subdomain (something like yourblog.blogspot.com or yourblog.tumblr.com).
Free blogging platforms will also subject you to their rules and restrictions. In fact, some of them will not allow you to monetize your blog.
That said, I recommend using WordPress.org as your blogging platform.
WordPress gives you complete control and allows you to monetize your blog/website in any way you want. It’s easy to use, highly customizable, and it’s the most popular website building software in the world.
Plus, using WordPress.org’s software is free. You’ll only need to pay for a domain name and web hosting.
Note: Be careful not to confuse WordPress.org with WordPress.com. WordPress.org has open-source software that you can use to create your own self-hosted blog/site. It gives you complete freedom and control over your site. On the other hand, WordPress.com offers less freedom because you’ll not be hosting your own site.
Step #4. Find a Good Web Hosting Provider
The web host is where all your website files will be stored on the internet. Web hosting is necessary for your blog to be live on the internet.
That said, I recommend Fast Comet for your web hosting, especially if you’re a beginner on a budget.
Why Fast Comet?
Well, Fast Comet has everything you need to start a successful blog without having to spend a lot of money. They are the most popular web host in the market, and they offer great features for new bloggers.
Fast Comet powers more than 2 million websites online and is the No. 1 recommended hosting provider by WordPress. With 24/7 support, free SSL certificates. Fast Comet web hosting is a great option.
How to set up Fast Comet
Setting up Fast Comet only takes a few minutes. It’s easy and super quick. Just follow the steps below:
1. Go to the Fast Comet homepage
Go to the Fast Comet website and then click the “Get Started” button. You will be taken to the hosting packages page.
2. Select a hosting plan
Once you land on the hosting packages page, explore what each plan offers and then select one that suits your needs.
If this is your first blog and you plan to only have one site, you can go with the Basic plan. If you plan to run multiple sites, go with the Plus plan.
3. Set up your Domain name
The next step is to set up your domain. You can create a new one or if you already registered a domain name elsewhere, just enter it in the “Use a domain you own” box.
Don’t worry if you can’t decide on a domain name right away. You can skip this step, finish signing up with Bluehost, and then choose your free domain name later.
4. Enter your account and payment information
After you’ve selected your domain name, Fast Comet will take you to a registration page where you can fill out your account information manually, or you can use Google Single Sign-In to make creating your account even easier.
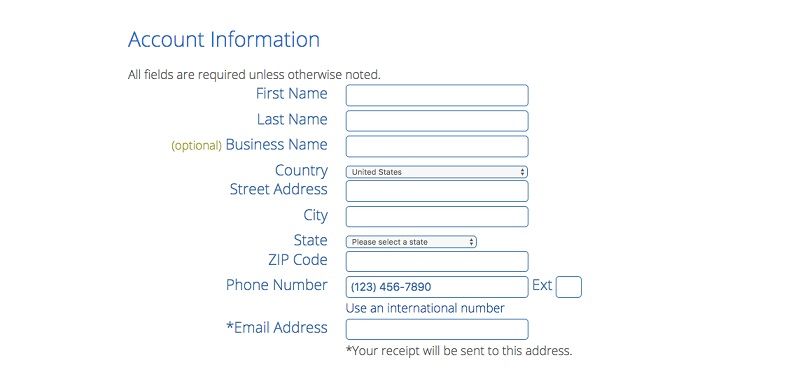
Once you’ve filled in all the necessary information, click “Submit”. Fast Comet will send you a confirmation email once the payment goes through. They will also send you another email to verify your email address and activate your domain name.
Next, you’ll be taken to a new page where you can create a password for your account!
>>> Click here to start your blog with Fast Comet! <<<
Step #5. Set up WordPress
Now that you’ve finished creating your Fast Comet web hosting account, it’s now time to start creating your blog.
Fast Comet makes it quick and easy to set up WordPress.
To get started with setting up your WordPress website, log in to your Fast Comet account.
This is where you’ll enter your blog’s name and some other information that describes it. Once you’re done filling out the required info, click “Continue”
You will then be taken to the next step, where you can pick a theme for your blog. Fast Comet will recommend to you several themes based on the information you entered in the previous step. See if you like them.
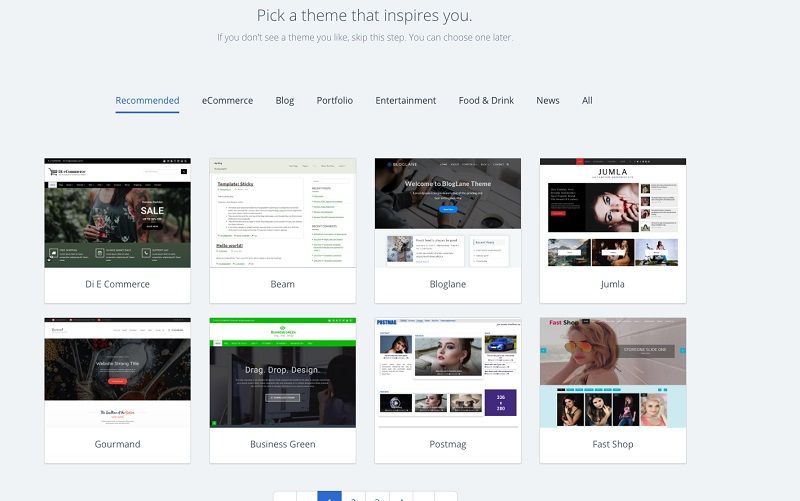
If you don’t like any of the recommended themes, skip this step. You can always change your WordPress theme anytime you want to.
Once you complete the steps above, the WordPress software will be installed and your blog structure will be set up.
Click the button that says “Start Building” and then on the next page, click the button that says “Log in to WordPress”.
You will be taken to your WordPress dashboard, which will look like in the screenshot below.
Now that you’ve installed WordPress, it’s time to add some content and customize your blog.
Step #6. Create Important Pages
So far, you’ve selected your domain name, got a hosting service, installed WordPress, and set up your blog’s structure. Your framework is all set.
It’s now time to start adding content to your site.
But before you start actually blogging, there are some important pages every blog should have.
Important pages include:
- About Me (Us) – This page should contain information about who you are and what your blog is about.
- Contant Me (Us) – This page provides visitors with a place to reach you. You can add a contant form or you can add your email address, phone number, or physical address.
- Privacy Policy – This is an important legal page your need to have on your site. The page should contain a statement telling your visitors how you collect their personal data, how you use it, and if you are sharing that data. There are many ways you’ll be collecting your visitors data, for instance, when they leave a comment on your blog, or when you implement Google Analytics.
- Disclaimer Page – Since you’ll be monetizing your blog, you need to add a statement disclosing how you’re making money from your content.
Most bloggers link to these important pages from the footer section (you can see an example at the bottom of this site).
Based on what fits your blog, there are other types of pages you can add to your site. Common examples include a donations page, an advertising page, and a contributions page inviting visitors to submit ideas and content.
To add a page to your blog:
- Make sure you’re logged in to your WordPress admin area. If not, log in with your details (username and password).
- Hover your cursor over the “Pages” menu item located on the left of the Dashboard. Click “Add New”.

Step #7. Add Blog Posts
Now that your blog is set and all your important legal pages are in place, it’s time to do some actual blogging.
My advice is, have at least 5-10 different blog posts that will be live when you launch your site. Take the time to plan out and write the content (you can do this with Google docs) before you start to technically create your blog.
Here is a simple approach to writing great blog content:
- Introduce the main topic idea of your blog post.
- Give an example(s) of the idea your writing about.
- Describe how to implement the idea.
As you write your content, make the paragraphs short and break it up using lists, headings, and subheadings. Use images and always edit your work. Also, make sure your content is always original.
To add your first blog post:
- Inside the WordPress dashboard, go to the left menu.
- Hover your cursor over the “Posts” menu item located on the left of the Dashboard. Click “Add New”.
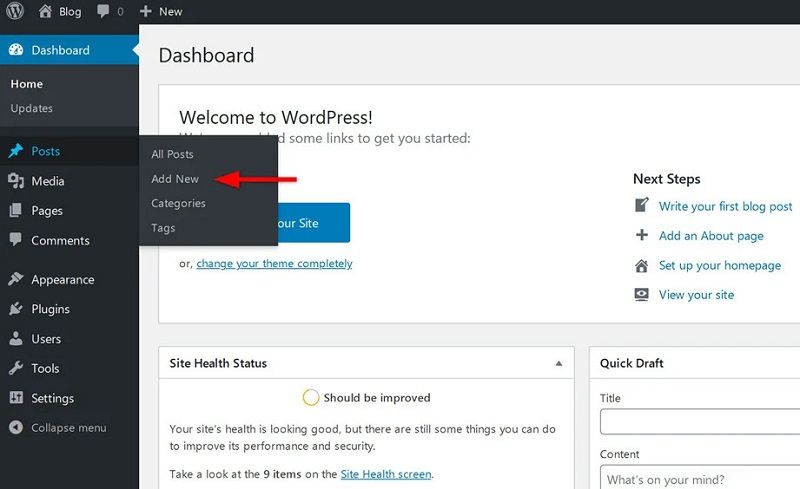
You will be taken to the post editor screen from where you can enter the title of your post and begin writing.
Once you finish writing your post and have added any accompanying images and graphics, you can click the “Publish” button at the top right side of the screen to make it live.
Step #8. Launch Your Blog
The final step of starting a blog is to make it live on the internet.
To make your blog public, click the “Fast Comet” menu item located at the top left of your WordPress dashboard, and then click the button that says “Launch your site”.
Congratulations! Your blog is now live on the internet and ready to be seen.
Next, I’ll talk about how to drive traffic to your blog. Keep reading!
How to get traffic to your new blog
When it comes to driving traffic to your website, I highly recommend you start by focusing on one platform at a time. Otherwise, you’ll spread yourself too thin and see very low results.
To give you an example, when I started growing this website, I chose to only focus on generating traffic from Pinterest.
This will depend on your niche, of course, but I generally advise beginners to also start with Pinterest. This platform can give you traffic really fast. I grew my blog’s traffic from 0-30, 000 visitors from Pinterest in just under 8 months. You can see my Pinterest profile here.
That said, Pinterest just doesn’t work for some niches. In that case, Google traffic should be your first option. The majority of Pinterest traffic consists of women. So, if your blog focuses on things that interest men, for instance, you’ll have low traffic potential on Pinterest.
With Google traffic, you’ll have to wait for around 6-12 months before you start getting any significant numbers. But with Pinterest, it doesn’t matter if your domain is new or whether or not it has domain authority.
While it takes time, Google search traffic is more stable because it doesn’t have the viral effect that you can experience on Pinterest. However, you have to put in the work and carefully research low-competition topics to write about, optimize your site, and acquire backlinks.
Another great source of traffic is YouTube. You can create a YouTube channel to accompany your blog, upload videos, and even rank them higher than your blog posts on Google search. Google owns YouTube, and so they sometimes give priority to videos on their own platform.
Like most other bloggers nowadays, I get very little traffic from Facebook and Instagram. These two platforms are simply not ideal for getting free traffic to your blog. You’ll have to pay for ads to get any significant traffic from these two social networks.
Monetizing Your Blog
To the part that excites most of us – monetization methods for your blog.
Now, let me show you how you can start making money from your site as a beginner blogger and how you can grow your revenue over time.
Most beginner bloggers start adding display ads such as Google Adsense or Media.net because it’s the easiest thing you can do with a new website. Usually, you can join such ad networks when you have about 20 posts on your blog.
In my honest opinion, however, you shouldn’t bother applying to Google Adsense when you have very low traffic because they pay so little per 1000 visitors. If your traffic is just a couple of hundreds or maybe a thousand visitors a month, you’ll be earning less than $10 per month. It’s simply not worth it sending your visitors away for such little money.
1. Affiliate Marketing
My top recommendation for beginner bloggers is to find affiliate products in your niche that you can promote. Some of the big affiliate networks that you can work with are:
- Amazon Associates Program
- MaxBounty
- Awin
- CJ Affiliates
- Shareasale
Depending on your niche, you can also partner directly with some product sellers. There are products that cost hundreds of dollars and which can pay out generous affiliate commissions of 30% or even 50%. In such cases, you could be earning $100 or more per sale.
Think about it. If from your blog content you link out to affiliate products such as the one discussed above, you’ll be able to make your first $1000/month even with a small amount of traffic.
2. Display Ads
Once your blog traffic gets to about 10, 000 page views a month, you can apply to join an ad network such as Ezoic. As I mentioned above, you can totally skip applying to Google Adsense.
Then, once you starting getting at least 50 000 monthly sessions on your blog, you can join a premium ad management company such as Mediavine. With this, you will be paid about 10x more than what you would be earning with Adsense for the same amount of traffic.
Keep in mind, though, that more than 50% of your traffic should be coming from the United States for you to be accepted by Mediavine. In this sense, Pinterest traffic can be really helpful because the majority are people from the USA.
3. Sell Your Services
When you’re just starting a new blog, you’ll usually work for months without a single paycheck. So, while growing your audience, you could also be offering services through your blog.
For example, you could reach out to established bloggers and offer to be their content writer, editor, or virtual assistant.
You can also start offering any other services and promote them through your blog. Services such as making voiceovers, translations, graphic design, or anything else you’re skilled in.
A blog is a perfect tool to establish yourself as an expert. And the best thing about selling your services through your blog is that you don’t have to pay any service fees that always apply when you use freelancing sites such as Upwork or Fiverr to find clients.
4. Selling Your Own Products
This is an advanced way of making money from your blog or website. You could even be selling physical products through your blog, but my recommendation is digital products.
The ROI for digital products is usually very high, and with the help of your blog, you could be earning a great income without even spending a penny on paid advertising.
You can sell lots of different products that don’t require a lot of customer support. For example:
- eBooks
- Printable files like binders, guides, and so on.
- DIY templates
- Stock photos (if you’re photographer)
- Online courses
Ready to Start Your Blog?
To wrap things up, the best advice I can give you is to stop doubting yourself and procrastinating. Don’t waste even one more day thinking about starting a blog.
If you really want to start, just do it and figure out everything along the way. The best time to start your blog was yesterday. And the second-best time to do it is today!
Hopefully, you found this guide useful. If so, share it with your friends and followers.
Have you been thinking about starting a blog? What’s stopping you? And where did you get stuck? Leave your comment below.

Very very Thanks for the contents provided by you here. It’s awesome. I am not a blogger but I am thinking how to start blogging, But how to collect information and contents about any topics for blogging, is big problem for me. Please guide me. I am waiting for your positive response.
Thanks and regards..